A small damp patch isn’t a minor problem to fix later; it’s the visible symptom of a major structural failure already in progress.
- Water ingress silently destroys timber rafters and insulation long before a drip appears.
- The cost of inaction grows exponentially, turning a sub-£500 repair into a £10,000+ structural rebuild.
Recommendation: Your first step is not to get a quote for the patch, but to commission a full roof inspection to understand the true extent of the damage.
That faint, brownish stain on your ceiling isn’t a cosmetic issue. It’s a final distress signal from your home’s most critical defence: the roof. As a roofer with decades of experience, I’ve seen homeowners make the same mistake time and again. They see a small damp patch and think, “I’ll get to it later.” They assume it’s a minor inconvenience, perhaps a single slipped tile that can be fixed for a small sum when they have the time or money. This is a dangerous and expensive assumption.
The common approach is to watch and wait, or perhaps to look for obvious, dramatic damage. But the truth is, by the time water has penetrated your sarking felt, saturated your insulation, soaked your ceiling joists, and finally stained your plasterboard, the damage is already extensive. The drip you see is the last link in a long chain of decay that has been unfolding silently above your head for months, or even years. This isn’t about a simple patch job anymore.
This guide takes a different approach. We are not going to talk about quick fixes. We are going to uncover the reality of what that small leak truly represents. It’s time to stop thinking about the cost of repair and start understanding the catastrophic cost of delay. This is a journey into the anatomy of a roof failure, showing you why swift, informed action is the only way to protect your property from spiralling costs and structural jeopardy.
This article provides an authoritative breakdown of the risks, inspection methods, and critical decisions you face. Explore the sections below to understand the full picture, from identifying hidden damage to making strategic repair choices that protect your investment for the long term.
Summary: A Homeowner’s Guide to Understanding and Acting on Roof Leaks
- Why a Small Drip Means the Damage Is Already Extensive?
- How to Check Your Roof From the Ground Using Binoculars?
- Slate vs Concrete Tile: Which Lasts Longer in UK Weather?
- The Cleaning Mistake That Cracks Tiles and Voids Warranties
- How to Add Warm Roof Insulation While the Tiles Are Off?
- The Dripping Tap Mistake That Wastes 5,000 Litres a Year
- The Planning Mistake That Ruins the Skyline of Historic Cities
- How Double-Glazing Window Replacement Improves Your EPC Rating to Band C?
Why a Small Drip Means the Damage Is Already Extensive?
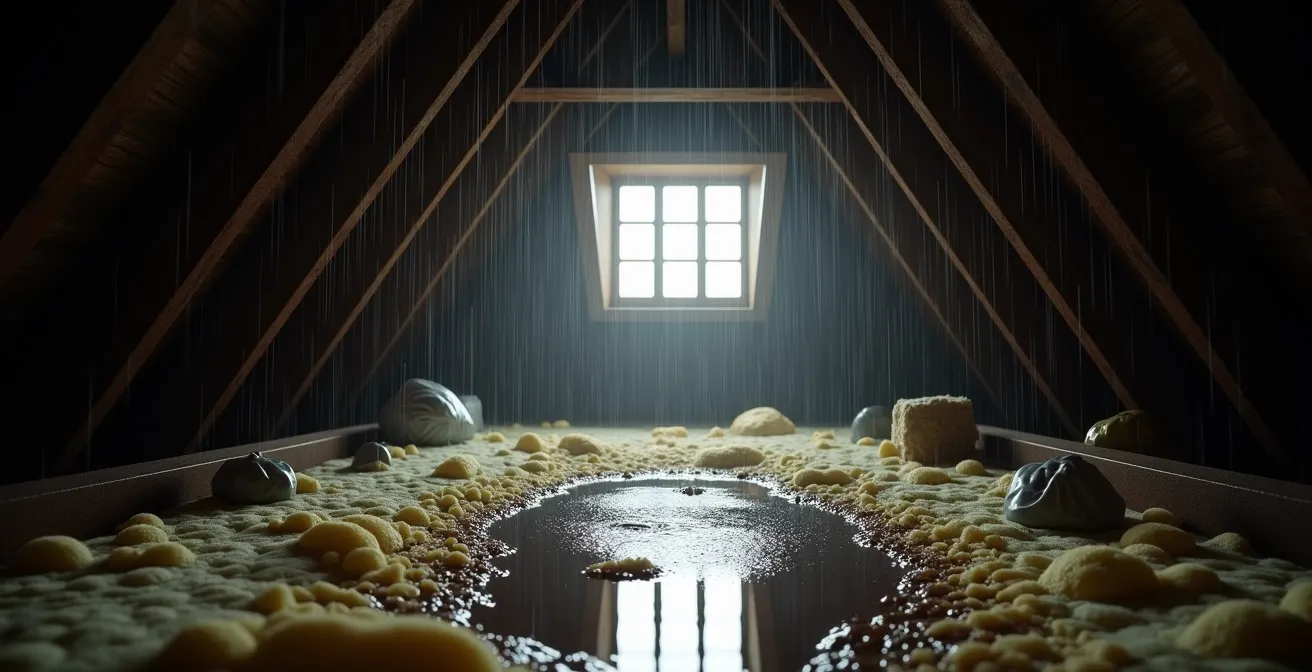
Let’s be perfectly clear: a water stain on your ceiling is the end of the story, not the beginning. It signifies that multiple layers of your roof’s structure have already failed. Water has breached the tiles, saturated the underlay, and is now working its way through the timber structure. This is not guesswork; it’s a predictable sequence of decay. The first casualty is your insulation. Once mineral wool gets wet, it loses its thermal properties and becomes a damp sponge held against your wooden roof timbers.
The next stage is far more sinister. Timber with a moisture content above 20% becomes a breeding ground for fungus. This is where the real structural damage begins. Fungal mycelium spreads across the wood, secreting enzymes that break down the fibres and cause rot. This process can severely impact the structural integrity of your roof, compromising the very frame that holds it up. This is a nationwide problem, with damage from wood rot costing UK property owners approximately £150 million annually.
By the time you see a drip, you could be months into this “catastrophe timeline.” The damage is happening out of sight, silently weakening rafters and joists. Left unchecked, a small leak that could have been a simple tile replacement evolves into a major structural repair project, involving timber replacement, new insulation, and extensive internal redecoration. The small drip is a symptom of a much larger, and far more expensive, disease.
How to Check Your Roof From the Ground Using Binoculars?
Your first instinct might be to get a ladder, but I’m telling you now: stay on the ground. Climbing onto a potentially compromised roof is incredibly dangerous, and you can easily cause more damage by dislodging tiles. A pair of binoculars is your safest and most effective tool for an initial assessment. From the safety of your garden or the street, you can spot the majority of common issues without taking a single risk.
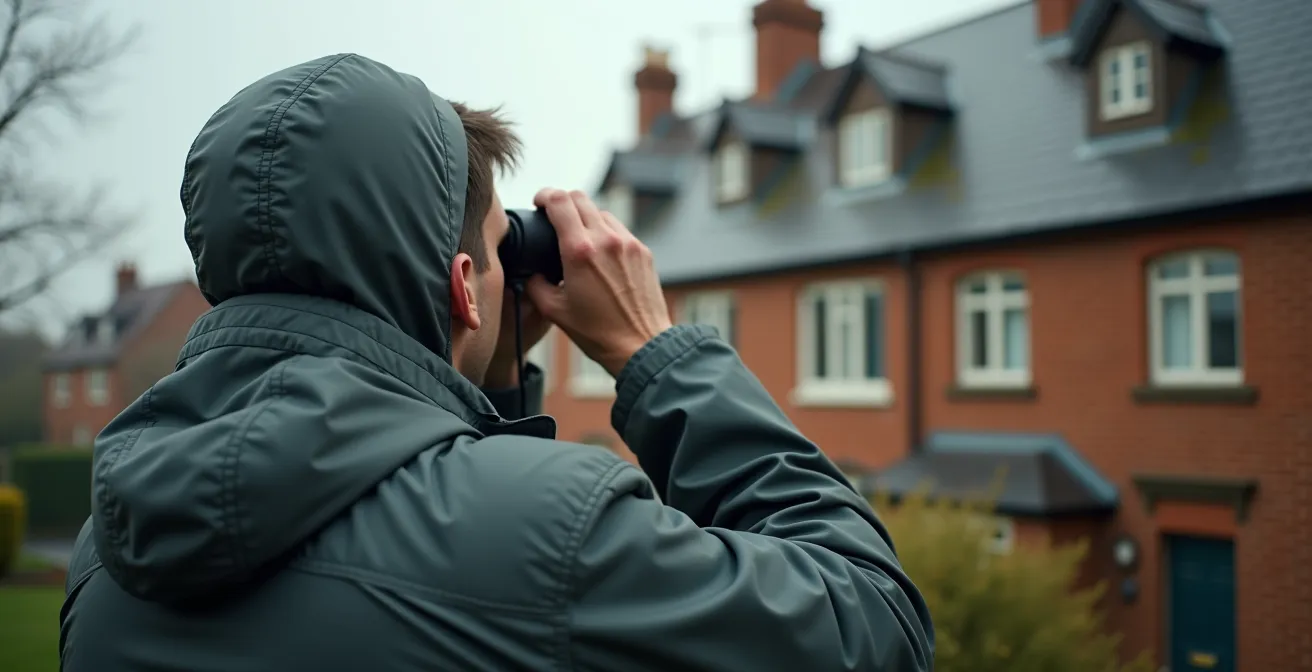
Look for the obvious signs of failure. On a slate roof, scan for any tiles that have slipped out of place, are cracked, or are missing entirely. For concrete tiles, pay close attention to the verges (the edges of the roof) for cracked mortar and any tiles that look damaged or have flaked due to frost. On flat roofs, binoculars are excellent for spotting blisters, tears in the membrane, or areas where water is pooling instead of draining away. Remember that in the UK, the repeated cycles of rainfall and drying weaken seals and flashing over time.
While this ground-level check won’t reveal the hidden damage to the timbers, it provides crucial evidence to guide a professional. If you can identify the likely point of water entry, you are one step ahead. This initial survey helps differentiate between a minor, localised issue and widespread degradation. While a professional repair averages around £375 for a minor issue, this inspection determines if you’re dealing with that or the first sign of a five-figure problem.
Your Ground-Level Roof Audit Checklist
- Points of Contact: Use binoculars to list all visible signs of failure: slipped slates, cracked concrete tiles, or blistering on flat roofs.
- Evidence Collection: Take clear photos of any identified problem areas. Make detailed notes on their location and severity.
- Damage Analysis: Cross-reference what you see with known vulnerabilities for your roof type, such as frost damage on concrete or moss build-up in valleys.
- Internal-External Correlation: Pinpoint the exact location of the internal damp patch. Try to match this to a specific area on the exterior of the roof.
- Professional Briefing Plan: Note the location of damage relative to fixed points like chimneys or vents to create a clear brief for a professional roofer, highlighting the most critical areas.
Slate vs Concrete Tile: Which Lasts Longer in UK Weather?
The material on your roof plays a huge role in its longevity, especially given the UK’s damp climate and freeze-thaw cycles. The two most common pitched roof coverings are natural slate (often Welsh slate) and concrete tiles, and their performance characteristics are vastly different. Understanding this difference is key to assessing your roof’s current state and future maintenance costs.
Natural slate is the undisputed champion of longevity. With a lifespan of 75 to over 100 years, its low porosity makes it exceptionally resistant to water absorption and frost damage—ideal for the UK. Concrete tiles are a more modern, cost-effective alternative, but their lifespan is significantly shorter, typically 40-60 years. They are more porous, making them vulnerable to saturation and cracking during freeze-thaw cycles, a common cause of failure.
This has significant implications for repairs, especially on older properties or those in designated areas. In Conservation Areas or on Listed Buildings, you may be legally required to replace materials on a like-for-like basis. Using the wrong material can result in an enforcement notice and a costly forced renovation. The financial stakes are high, as a simple repair can escalate from a £500 timely repair to a forced £15,000 renovation if compliance rules are broken.
The following table breaks down the key differences, highlighting why the initial saving on concrete tiles can often lead to higher costs over the building’s life.
| Feature | Welsh Slate | Concrete Tiles |
|---|---|---|
| Lifespan | 75-100+ years | 40-60 years |
| UK Weather Resistance | Excellent – low porosity ideal for high rainfall | Good – vulnerable to freeze-thaw cycles |
| Weight | Lightweight | Heavy – may overload older structures |
| Maintenance | Low-maintenance but expensive individual repairs | Cheaper repairs but more frequent attention needed |
| Conservation Areas | Often required by law | May not be permitted |
| Whole Life Cost | Higher initial, lower long-term | Lower initial, higher maintenance |
The Cleaning Mistake That Cracks Tiles and Voids Warranties
In an attempt to improve their home’s appearance, many owners turn to pressure washing to remove moss and algae from their roof. This is one of the most damaging things you can do to your tiles. A high-pressure water jet is an aggressive, destructive force. It strips away the protective granular surface of concrete tiles, exposing the porous material underneath. This dramatically increases water absorption, leading directly to frost damage and premature failure.
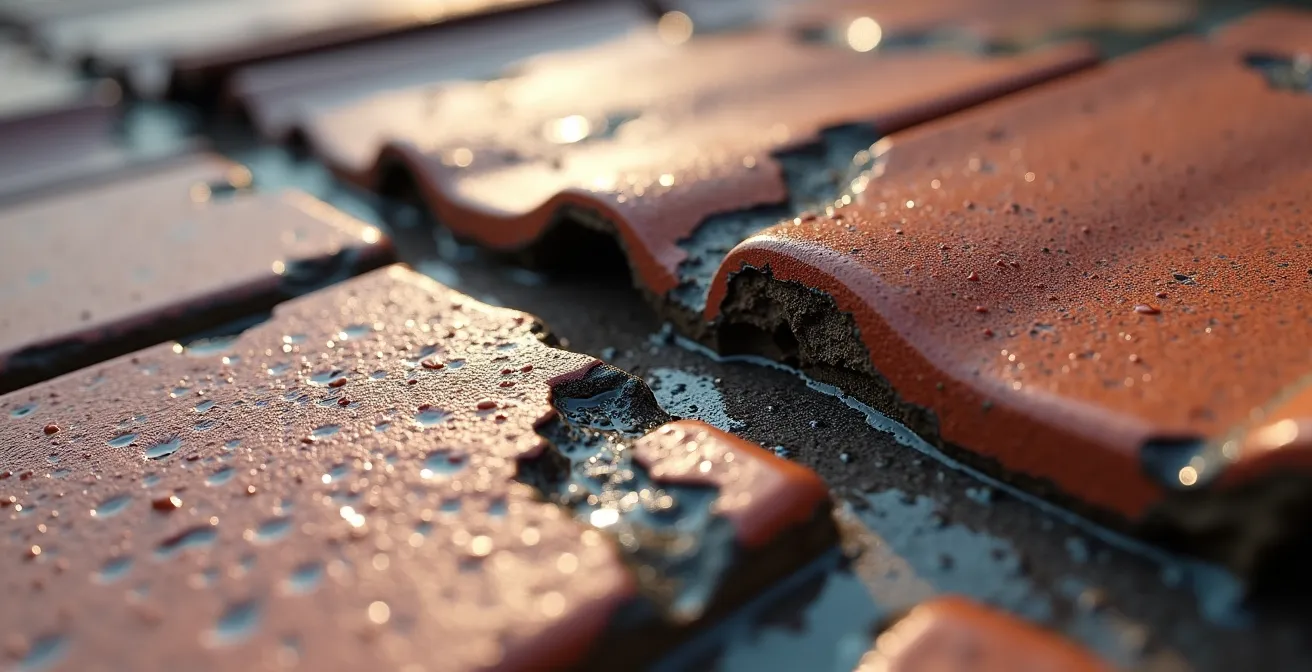
For both slate and clay tiles, the intense pressure can force water up and underneath the overlaps, saturating the underlay and timbers directly. It can also easily crack older, more brittle tiles or dislodge them completely, turning a cosmetic cleaning job into an urgent repair situation. The damage is often not immediately obvious, but you have fundamentally shortened the lifespan of your roof covering.
Worse still, this action almost certainly voids your home insurance cover for any subsequent leaks. As one UK insurance industry standard on common warranty conditions states, this is not considered routine maintenance:
Improper cleaning can be classified as ‘failure to maintain’ or ‘willful damage’ by UK home insurance providers
– UK Insurance Industry Standard, Common warranty void conditions
By trying to save money on professional moss removal, you risk a far greater financial penalty. If your roof fails and your insurer discovers it was recently pressure washed, your claim for water damage—both to the roof and the interior of your home—will likely be rejected. You will be left to foot the entire bill yourself.
How to Add Warm Roof Insulation While the Tiles Are Off?
If a major repair or roof replacement is unavoidable, you have a golden opportunity to drastically improve your home’s energy efficiency. While the tiles are off is the perfect time to convert your traditional “cold roof” into a “warm roof” system. This involves laying rigid insulation boards over the top of the rafters, before the waterproof membrane and tiles are re-laid. This is a far superior method to simply laying insulation between the joists on the loft floor.
A warm roof design keeps the entire roof structure, including the timbers, on the “warm” side of the insulation. This is a critical advantage in the UK’s humid climate. It dramatically reduces the risk of condensation forming on the timbers, which is a primary cause of rot and structural decay. By preventing the cycle of damp and drying, you are safeguarding the long-term health of your roof’s wooden frame.
The benefits extend beyond structural protection. A warm roof provides significantly better thermal performance, preventing heat from escaping and therefore lowering your energy bills. It also creates a warm, usable loft space, perfect for conversion into an extra room without the complexities of insulating at the rafter line from inside. Furthermore, upgrading your roof’s insulation is a key factor in improving your home’s Energy Performance Certificate (EPC) rating and may qualify you for various UK energy efficiency grants and schemes. It turns a necessary repair into a smart, long-term investment.
The Dripping Tap Mistake That Wastes 5,000 Litres a Year
We’ve all heard the warnings about a dripping tap wasting thousands of litres of water a year. It’s a powerful image of how a small, persistent problem can lead to significant waste. Now, I want you to apply that exact same logic to your roof. That ‘small’ leak is a dripping tap, but instead of water going down the drain, it’s seeping into the very fabric of your home. And the cost isn’t measured in pennies for water, but in thousands of pounds for structural decay.
A tap that drips once per second can waste over 5,000 litres of water in a year. The cost of that water is negligible, perhaps £5 or £10. But a roof that ‘drips’ at the same rate into your roof space is causing progressive, catastrophic damage. The financial comparison is stark and should serve as a serious warning. While you might ignore the cost of wasted water, you cannot afford to ignore the cost of a rotted roof structure.
The cost inversion is staggering. Repairing a leak and the resulting water damage can cost anywhere from £1,000 to over £6,000, and that’s if you catch it before the primary structural timbers are compromised. The mistake is treating the roof leak with the same low level of urgency as a dripping tap. One impacts your water bill; the other threatens the structural and financial stability of your biggest asset. Don’t fall into the trap of underestimating a persistent drip.
Key Takeaways
- A visible leak indicates advanced, hidden structural damage, not a new problem.
- Aggressive cleaning methods like pressure washing can cause severe damage and void insurance warranties.
- The building envelope must be secure before investing in other energy-efficiency upgrades like windows; a sound roof is the priority.
The Planning Mistake That Ruins the Skyline of Historic Cities
If you live in a historic property, such as a Listed Building or in a Conservation Area, your responsibilities extend beyond simply keeping the water out. You are a custodian of the building’s character, and any repairs must respect strict planning regulations. The most common and costly mistake is to assume you can use standard, modern materials for a repair. This is a direct route to a planning breach.
Local authorities have legal powers to enforce the use of historically appropriate materials, such as natural slate instead of concrete tiles, or cast-iron guttering instead of plastic. Undertaking unauthorised repairs, even if they are structurally sound, can result in an enforcement notice demanding you undo the work and redo it correctly, at your own expense. This can double or triple the cost of the project and cause immense stress.
This is not just bureaucratic red tape; it is the law. As stated in the Listed Buildings and Conservation Areas Act, carrying out unauthorised work on a Listed Building is a criminal offence that can lead to unlimited fines or even imprisonment. Before you even think about hiring a roofer, your first step must be to contact your local council’s conservation officer to understand exactly what is permitted. Ignorance of the rules is no defence and will not protect you from severe financial and legal penalties.
How Double-Glazing Window Replacement Improves Your EPC Rating to Band C?
Improving your home’s EPC rating is a sensible goal, and many homeowners immediately think of replacing windows. While double or triple glazing does reduce heat loss, it is often a case of treating a symptom while ignoring the disease. If your roof is leaking, your primary source of heat loss is not through the glass; it’s through damp, ineffective insulation. Investing thousands in new windows while your roof is failing is like bailing out a boat with a teacup while there’s a huge hole in the hull.
The numbers speak for themselves. The principle of the building envelope—the complete shell of your house—dictates that you must secure the largest areas of potential failure first. A roof is a massive surface area. Research shows that where a damp roof is causing a 25% heat loss, new windows saving 15% will be a futile investment. You are pouring money into a system that is fundamentally broken at its highest point.
A “Building Envelope First” strategy is the only logical approach. This means ensuring your roof is sound, dry, and properly insulated *before* considering other upgrades. Constant quick fixes for a leaking roof are not enough to prevent ongoing thermal loss and structural damage. A dry, well-maintained roof is the foundation of an energy-efficient home. Fix the leak, dry or replace the insulation, and ensure the structure is sound. Only then should you turn your attention to windows and other improvements. Otherwise, you are simply throwing good money after bad.
Before that damp patch becomes a structural crisis, your next step is to commission a professional inspection to assess the real condition of your roof and protect your property from catastrophic failure.