Upgrading your bathroom’s hygiene and function doesn’t require a messy, full-scale remodel; the most significant gains come from strategically upgrading its underlying ‘hygienic infrastructure’.
- Focus on high-impact, low-disruption changes like touchless fixtures and flawless sealant application to eliminate common micro-contamination points.
- Improve “cleaning ergonomics” by selecting fixtures like skirted toilets and frameless glass screens that are inherently easier to maintain.
Recommendation: Prioritize upgrades that reduce physical contact and eliminate hard-to-clean crevices. This approach delivers a more sanitary space with less daily effort.
For many flat owners, the dated, impractical bathroom is a source of daily friction. The dream of a full remodel—with gleaming new tiles and a spacious layout—often clashes with the reality of budget, time, and the disruption it causes. Common advice revolves around cosmetic fixes: a new coat of paint, fresh towels, or decluttering. While these can offer a temporary lift, they fail to address the core issue: the room’s underlying sanitary functionality. A bathroom that is difficult to clean will never feel truly clean, and fixtures that are poorly designed will always be inefficient.
The problem isn’t just about aesthetics; it’s about the room’s very infrastructure. It’s the persistent mould in the corner of the tub, the awkward space behind the toilet that gathers dust, and the constant wiping of tap handles. These are not just annoyances; they are breakdowns in the bathroom’s hygienic design. But what if the key wasn’t a sledgehammer and a complete overhaul, but a series of precise, intelligent upgrades? What if you could fundamentally improve how your bathroom functions and stays clean by acting more like a designer and less like a demolition crew?
This guide offers a different perspective. We will move beyond superficial changes to explore targeted interventions that enhance your bathroom’s “hygienic infrastructure” and spatial efficiency. By focusing on the ‘why’ behind each choice, from the technology in your taps to the very sealant in your shower, you’ll learn how to execute a smart, partial renovation that delivers maximum functional and sanitary impact with minimal downtime. This is about making your space work better for you, one strategic upgrade at a time.
To guide you through this process, we’ve structured this article to address the most critical pain points and strategic solutions for a small bathroom. Explore the sections below to build your own targeted upgrade plan.
Summary: A Practical Guide to a More Functional and Hygienic Small Bathroom
- Why Touchless Taps Are Not Just for Public Toilets Anymore?
- How to Reseal a Bathtub to Prevent Mold and Leaks?
- Curtain vs Glass Screen: Which Is More Hygienic for Families?
- The Spacing Error That Makes It Hard to Clean Behind the Toilet
- In Which Order Should You Replace Fixtures to Minimize Downtime?
- Why the Space Above Your Door Is the Best Storage You Are Not Using?
- The Patch Test Step That 90% of People Skip at Their Peril
- How Energy-Efficient Plumbing Upgrades Cut Your Water Bill by £200/Year?
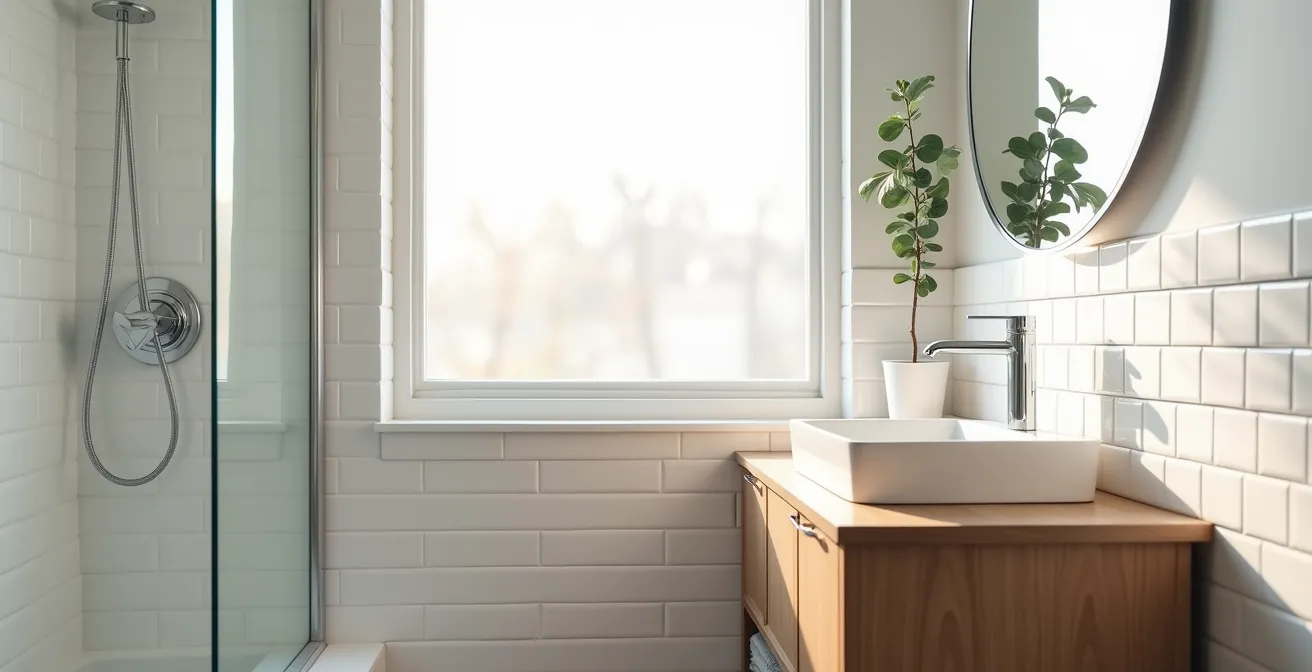
Why Touchless Taps Are Not Just for Public Toilets Anymore?
The journey from a public restroom staple to a smart home upgrade is complete. Touchless taps, once a symbol of impersonal efficiency, are now one of the most intelligent additions you can make to a small family bathroom. Their primary benefit is obvious but profound: they sever a key link in the chain of cross-contamination. Every time you touch a traditional tap handle with unwashed hands, you leave germs behind, only to pick them up again after washing. A touchless model eliminates this micro-contamination point entirely, creating a fundamentally more hygienic hand-washing experience.
Beyond hygiene, these fixtures bring a level of control and efficiency that is perfect for a modern home. Many models allow you to set a maximum flow rate, and their sensors dispense water only when needed, preventing taps from being left running by accident. This responsible water usage has a significant impact. For instance, according to EPA WaterSense, replacing old, inefficient faucets with certified models can save families 700 gallons of water per year. This is a clear win for both the environment and your utility bills.
From a design perspective, the clean lines and minimalist aesthetic of touchless taps contribute to a sense of uncluttered modernity. They remove the visual noise of handles and levers, which in a small space, creates a more streamlined and sophisticated look. It’s an upgrade that enhances not just the sanitary functionality of your bathroom but also its visual language, proving that high-tech convenience and elegant design can go hand-in-hand.
How to Reseal a Bathtub to Prevent Mold and Leaks?
A cracked, mouldy, or peeling line of sealant around a bathtub is more than just an eyesore; it’s a critical failure of your bathroom’s hygienic infrastructure. This single point of weakness allows water to seep behind walls and under floors, creating the perfect dark, damp environment for mould to flourish and potentially causing structural damage. Simply applying a new layer of silicone over the old is a common mistake that only traps moisture and guarantees failure. A professional, long-lasting seal requires removing the old material completely and preparing the surface meticulously.
The secret to a durable seal lies in achieving perfect adhesion and flexibility. After scraping away all old sealant and cleaning the joint with denatured alcohol to remove soap scum and residue, the area must be bone dry. The application itself is an art. For a perfectly tooled, concave finish that repels water effectively, the key is consistent pressure and a smooth finishing tool. This shape is not just for looks; it ensures water beads and rolls away, rather than pooling at the joint.

However, the most overlooked step is curing. As demonstrated in tutorials by experts like Home Repair Tutor, a full 24-48 hour curing period is non-negotiable. During this time, the bathroom should be kept as dry as possible. One professional technique to prevent future failure is to fill the tub with water *before* applying the sealant. This “water weight pre-stressing” slightly widens the gap to its maximum, so when the sealant cures and the tub is emptied, it will be under slight compression, making it far less likely to pull away and crack over time. This ensures true seal integrity.
Curtain vs Glass Screen: Which Is More Hygienic for Families?
The debate between a shower curtain and a glass screen often centres on aesthetics and cost, but from a sanitary perspective, the choice is more nuanced. A shower curtain, with its folds and porous liner, presents numerous surfaces for soap scum and moisture to accumulate, creating an ideal breeding ground for bacteria like the infamous pink slime (Serratia marcescens). While a fabric liner can be machine-washed, this adds a recurring task to your cleaning routine, and PVC liners are difficult to clean effectively and must be replaced often.
A glass screen, on the other hand, presents a single, non-porous surface. This dramatically simplifies cleaning and eliminates the hidden habitats for mould and mildew. When squeegeed daily after use, a glass screen can remain pristine and prevent the buildup of hard water spots and soap scum. The key to maximizing its hygienic potential is in the design. Opting for a frameless screen with minimal hardware reduces the number of tracks and crevices where mould can take hold, a common issue with older, framed designs. Applying a hydrophobic coating can also make water bead up and roll off, further simplifying maintenance.
For a direct comparison, the functional differences are clear. While a glass screen requires a small daily habit, it offers superior long-term hygiene. A curtain may seem lower maintenance initially, but it requires regular deep cleaning or replacement to prevent it from becoming a significant source of bathroom bacteria.
| Feature | Shower Curtain | Glass Screen |
|---|---|---|
| Cleaning Frequency | Weekly machine wash for liner | Daily squeegee required |
| Common Issues | Pink slime (Serratia marcescens) | Mold in tracks and hardware |
| Maintenance Cost | $20-40 annual liner replacement | $50+ for hydrophobic coating |
| Best For | Families with washing routine | Minimalist bathrooms |
Ultimately, a glass screen represents a better investment in your bathroom’s hygienic infrastructure. It not only contains water and aerosolized particles more effectively but also contributes to better “cleaning ergonomics” by presenting a simple, smooth surface that is quick and easy to maintain. This data, based on insights from home design experts like those at HGTV on bathroom renovations, highlights that the right choice depends on your willingness to adopt a small daily habit for a cleaner long-term result.
The Spacing Error That Makes It Hard to Clean Behind the Toilet
One of the most frustrating and unhygienic spots in any bathroom is the tight, awkward gap behind the toilet. It’s a magnet for dust, hair, and moisture, yet its inaccessibility makes it nearly impossible to clean thoroughly. This isn’t a personal failing; it’s a design flaw. Standard toilets have a complex footprint with exposed trapways and require a significant clearance from the wall, creating what designers call “dead space” that is functionally useless and a nightmare to maintain. Improving the cleaning ergonomics of this zone is a top priority in a sanitary upgrade.
Fortunately, you don’t need to move plumbing to solve this. Modern toilet design offers several solutions that can be installed without a full remodel. As home fixture experts at Ferguson Home note, skirted one-piece toilets are a game-changer. These models conceal the convoluted trapway behind a smooth, flat surface that can be wiped clean in seconds. There are no nooks or crannies for dust to hide. For even tighter spaces, compact elongated models offer the comfort of a larger seat but with a smaller footprint, potentially increasing the clearance around the unit.
Another excellent option is the back-to-wall toilet. This design sits flush against the wall, completely eliminating the dreaded gap behind it. While a wall-hung toilet (which requires opening the wall) is the ultimate solution for floor cleaning, a back-to-wall model provides a similar aesthetic and cleaning benefit without the major construction. By choosing a fixture designed with maintenance in mind, you are fundamentally upgrading your bathroom’s hygienic infrastructure, saving time and effort every week.
Your Action Plan: Solving Toilet Cleaning Challenges
- Measure your toilet’s rough-in dimension (the distance from the wall to the center of the drain) before considering any replacements to ensure compatibility.
- Explore compact elongated models specifically designed to provide more user comfort in tight bathroom spaces.
- Install a skirted toilet to eliminate the exposed, hard-to-clean trapway, creating a smooth surface from top to bottom.
- Invest in flexible, long-handled brushes and microfiber dusters specifically designed for navigating the tight spaces around existing toilets.
- Consider back-to-wall toilets as a practical, no-remodel alternative to wall-hung models, which completely eliminates the rear gap.
In Which Order Should You Replace Fixtures to Minimize Downtime?
When undertaking a series of upgrades without a full remodel, the sequence of operations is critical. A haphazard approach can lead to rework, damage to new installations, and unnecessary downtime. The key is to work with gravity and logic: from top to bottom, and from “dry” work to “wet” work. This strategic phasing ensures that dust and debris from one task don’t ruin a freshly installed fixture below it, and that essential services like plumbing are disrupted for the shortest possible time.
The optimal sequence starts with the ceiling. Any work involving ventilation fans, lighting, or painting should be completed first. This prevents dust and paint drips from falling onto new fixtures. Once the ceiling is done, move to the walls. This is the time to replace mirrors, install new medicine cabinets, update wall sconces, or apply a fresh coat of paint. This phase should be completed before any new floor-level items are brought in.
Next, install the vanity and sink. This is often the most complex “dry” fixture, as it involves both cabinetry and plumbing connections. Getting it set in place allows the plumber to finalize the connections for the sink’s taps and drain in a single visit. The very last item to be installed should be the toilet. As the primary floor-level fixture, installing it last protects it from being bumped, scratched, or used as a workbench during other installations. This top-to-bottom, dry-to-wet approach, as recommended by professional builders, is the most efficient way to manage a partial renovation and ensures your bathroom remains as functional as possible throughout the process.
Why the Space Above Your Door Is the Best Storage You Are Not Using?
In a small bathroom, every square inch counts. Yet, one of the most valuable storage areas is almost universally ignored: the vertical space above the door frame. This “air space” is typically empty, a forgotten plane in an otherwise cramped room. From a spatial design perspective, utilizing this area is a masterstroke of efficiency. It allows you to add significant storage capacity without consuming any of the bathroom’s precious floor footprint or encroaching on critical circulation paths. As design experts often note, it’s astonishing that in most homes, 90% of overhead door space goes unused.
Installing a simple, sturdy shelf in this location transforms it from dead space into a prime spot for storing items that you don’t need to access daily. Think extra towels, bulk supplies of toilet paper, or baskets of cleaning products. By moving these items up and out of the way, you free up valuable space in your vanity or medicine cabinet for everyday essentials. This not only declutters your primary storage but also helps create a more organized and serene environment.
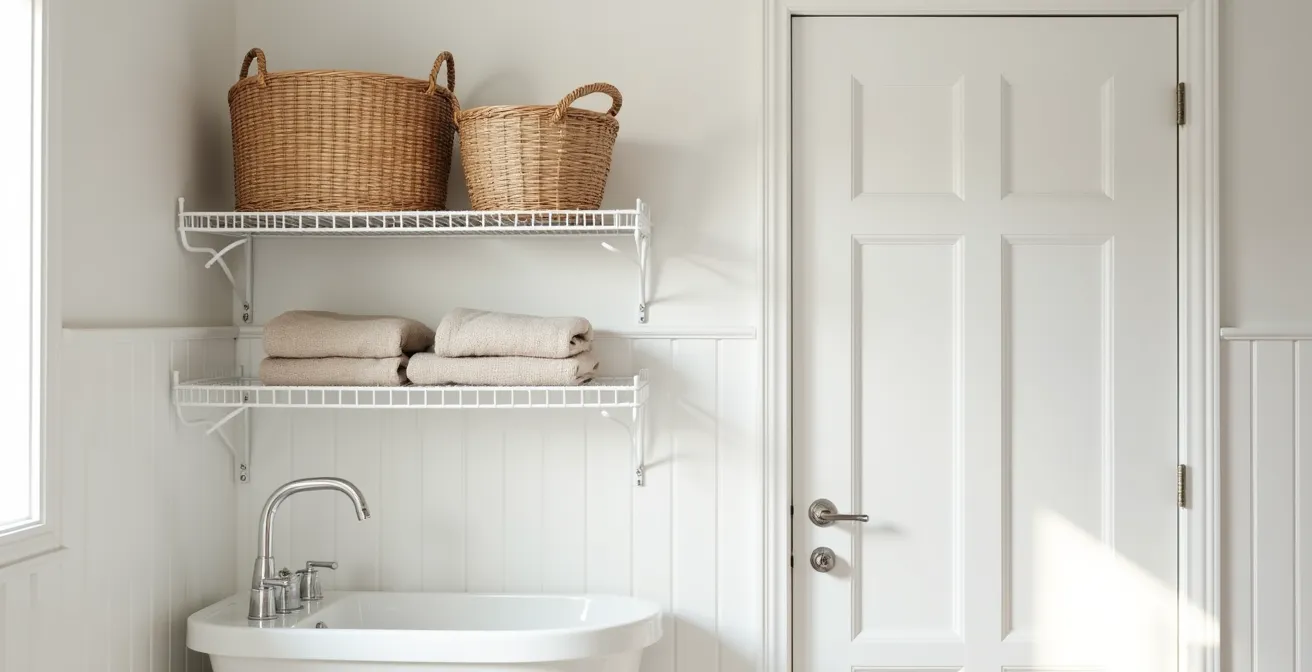
The key to making this storage feel intentional and stylish—rather than cluttered—is consistency. Choose high-quality shelving that matches your bathroom’s aesthetic, whether it’s a sleek floating shelf or a more traditional bracketed one. Use identical baskets or containers to hold your items. This creates a sense of visual rhythm and order, turning a purely functional solution into a deliberate design element. It’s a simple, low-cost upgrade that leverages an often-wasted dimension of the room, proving that smart spatial optimization can be more impactful than simply adding more furniture.
The Patch Test Step That 90% of People Skip at Their Peril
In the excitement of a renovation project, the urge to see immediate results is strong. This often leads to skipping one of the most crucial, yet simple, steps in a professional’s playbook: the patch test. Whether you’re trying a new heavy-duty cleaner, applying a different paint sheen, or using a new type of sealant, applying it to a small, inconspicuous area first is a non-negotiable safety net. This simple act can prevent a catastrophic, costly, and time-consuming mistake. It reveals how a new product will react with your existing surfaces, lighting, and bathroom environment.
A patch test is more than just dabbing paint on a wall. It’s a systematic process. For paints, you should test samples on different walls to see how they look in varying light conditions throughout the day. For cleaners, apply to a hidden spot (like behind the toilet or inside the vanity door) and leave for 24 hours to check for any discoloration or damage to the finish. For sealants and grouts, testing on spare tiles or a discreet corner ensures compatibility and proper adhesion before you commit to the entire area.
This methodical approach is the difference between a DIY success and a DIY disaster. It’s the professional discipline that protects your investment of time and money.
Case Study: The Power of a Patch Test
In a well-documented affordable bathroom project, DIY blogger Sarah at Grace in My Space demonstrated the value of this step. By properly patch testing her chosen paint, she discovered it reacted poorly with the existing moisture-resistant primer, causing it to bubble. This quick test, which took only a few hours, prevented her from having to scrape and repaint the entire bathroom, saving her hundreds of dollars and days of frustrating rework on her $1,000 remodel budget. It’s a powerful testament to the “measure twice, cut once” philosophy.
Skipping this step is a gamble you can’t afford to take. It’s the quiet, patient work that ensures your final results are flawless and durable, safeguarding you from the peril of unforeseen chemical reactions and aesthetic mismatches.
Key Takeaways
- Hygiene is designed, not just cleaned. Fixture choices (touchless taps, skirted toilets) are your first line of defense against dirt and germs.
- The integrity of your seals is non-negotiable. Proper application and curing of high-quality silicone prevent mould and water damage at the source.
- A strategic order of operations—working from top to bottom—minimizes downtime and protects new installations during a partial upgrade.
How Energy-Efficient Plumbing Upgrades Cut Your Water Bill by £200/Year?
While the primary motivation for a sanitary upgrade is often hygiene and aesthetics, the financial benefits of choosing energy-efficient fixtures are substantial and shouldn’t be overlooked. A dated bathroom is not just harder to clean; it’s also a significant source of water waste. Old toilets, leaky taps, and high-flow showerheads can collectively drain hundreds of pounds from your bank account each year through inflated utility bills. Investing in modern, water-saving plumbing is an upgrade that pays for itself.
The technology has advanced dramatically. Modern low-flow toilets, for example, use a fraction of the water of older models while providing superior flushing power. High-efficiency showerheads use aeration to create the feeling of a powerful spray while using significantly less water. And simple, inexpensive faucet aerators can reduce the water flow from your sink by 30% or more without any noticeable difference in pressure. These are not compromises; they are examples of smarter engineering.
The cumulative effect of these upgrades can be staggering. While figures vary by household, it is a widely accepted industry benchmark that a systematic replacement of old fixtures with modern, water-efficient models can lead to annual savings in the realm of £200 for a typical UK family. A real-world example of this principle is the zHome community in the USA, the first to be fully labelled under the EPA’s WaterSense program. A case study on their website shows that by using certified fixtures throughout, the community achieved sustained water savings of over 30%, translating into hundreds of dollars in annual savings for each resident. This proves that a bathroom that is good for hygiene can also be very good for your wallet.
To put these principles into practice, the next logical step is to assess which upgrades offer the most value for your specific situation and create a targeted plan that enhances hygiene, functionality, and efficiency.