In summary:
- Focus on targeted, high-impact upgrades rather than purely cosmetic changes to solve core functional problems.
- Improve hygiene by controlling moisture with proper sealing, non-porous materials like glass screens, and touchless technology.
- Optimize your project’s sequence to replace fixtures efficiently, minimizing bathroom downtime and disruption.
- Leverage vertical and unused spaces, like the area above the door, to increase storage and protect items from airborne particles.
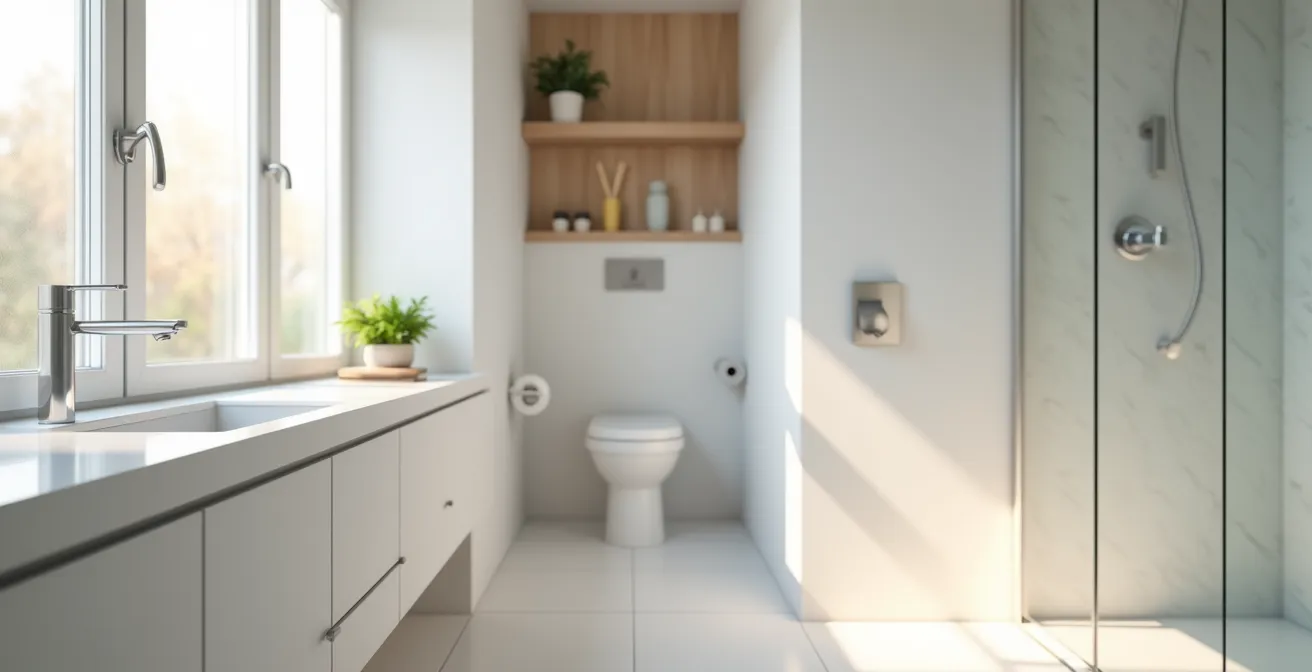
The frustration of a small, dated bathroom is a daily reality for many flat owners. It feels cramped, the fixtures are impractical, and keeping it truly clean seems like a losing battle. The common advice often circles around surface-level fixes: a fresh coat of light-coloured paint or a larger mirror to create an illusion of space. While these can help, they don’t address the root causes of poor functionality and questionable hygiene that make the space so challenging to live with.
The real problems in a small bathroom are often invisible. They are issues of flow—the flow of water, of air, and of your own movement within the space. They are the hidden hygiene hotspots where moisture and grime accumulate, far from the reach of a cleaning cloth. To truly transform such a space without the cost and chaos of a full remodel, you need to shift your perspective from cosmetic touch-ups to strategic, targeted interventions. It’s not about making the room *look* bigger, but about making it *work* smarter.
This guide moves beyond the obvious to focus on the principles of spatial intelligence and sanitary design. We will explore a series of high-impact upgrades that address these invisible flows. Each section breaks down not just what to do, but why it works, empowering you to make small changes that deliver a significant improvement in your bathroom’s daily use, cleanliness, and overall feel.
To navigate this practical guide to transforming your bathroom, the summary below outlines the key areas we will cover. Each point is a step towards a more functional and hygienic space.
Summary: A Guide to Smart Bathroom Upgrades
- Why Touchless Taps Are Not Just for Public Toilets Anymore?
- How to Reseal a Bathtub to Prevent Mold and Leaks?
- Curtain vs Glass Screen: Which Is More Hygienic for Families?
- The Spacing Error That Makes It Hard to Clean Behind the Toilet
- In Which Order Should You Replace Fixtures to Minimize Downtime?
- Why the Space Above Your Door Is the Best Storage You Are Not Using?
- The Patch Test Step That 90% of People Skip at Their Peril
- How Energy-Efficient Plumbing Upgrades Cut Your Water Bill by £200/Year?
Why Touchless Taps Are Not Just for Public Toilets Anymore?
The journey from turning on the tap with dirty hands to washing them, only to touch the same handle again to turn it off, is a classic example of a broken sanitary workflow. This simple sequence re-contaminates your hands and makes the tap a prime breeding ground for bacteria. While once seen as a commercial or public-space luxury, touchless technology is now a cornerstone of modern domestic hygiene, especially in compact bathrooms where germs can spread easily.
From a design perspective, installing a sensor-activated faucet is a targeted intervention that fundamentally improves the room’s sanitary function. It breaks the chain of contamination at its source. For flat owners, the upgrade is surprisingly straightforward. Many modern touchless taps are designed to be retrofitted into existing sink holes and can be powered by long-lasting batteries, eliminating the need for complex electrical work. This makes it an accessible DIY project that offers a disproportionately high return in terms of cleanliness and convenience.
Furthermore, these fixtures often include aerators that reduce water consumption without sacrificing pressure, contributing to lower utility bills. It’s a small change that elevates the daily experience, making the bathroom feel more modern, cleaner, and more efficient. The investment pays dividends in both hygiene and peace of mind, proving its value far beyond a simple aesthetic update. In fact, many homeowners find that a simple fixture upgrade can radically change a bathroom’s feel for a minimal investment.
This shift towards smarter, cleaner technology is a key step in modernizing a small bathroom’s core functionality without resorting to major renovations.
How to Reseal a Bathtub to Prevent Mold and Leaks?
The dark, discoloured sealant around a bathtub is more than just an eyesore; it’s a critical failure in your bathroom’s defense against moisture. Cracked or peeling caulk creates a direct path for water to seep behind walls and under floors, leading to mould growth, structural damage, and persistent damp smells. As studies show that up to 95% of bathroom water damage can be prevented with proper caulking, mastering this task is essential. It’s the ultimate targeted intervention for controlling the invisible flow of water.
Achieving a professional, long-lasting seal requires more than just applying a new layer of caulk over the old one. The key is in the preparation and the choice of material. You must completely remove the old sealant and clean the surface with isopropyl alcohol to ensure the new bead adheres perfectly. For a truly durable, mould-resistant finish, always opt for 100% silicone caulk over cheaper acrylic alternatives. Silicone remains flexible and is far more resistant to the damp conditions of a bathroom.
One professional trick that many DIYers miss is to fill the bathtub with water before applying the sealant. This slightly widens the gap between the tub and the wall, pre-stressing the joint. When the tub is empty, the sealant will be under slight compression, making it far less likely to tear or pull away when the tub is filled again. After application, smoothing the bead with a caulking tool creates a uniform surface that is easier to clean and less prone to trapping soap scum.
This small but meticulous task is one of the most effective ways to protect your property, eliminate a major hygiene hotspot, and restore a clean, sharp look to your bathroom.
Curtain vs Glass Screen: Which Is More Hygienic for Families?
The choice between a shower curtain and a glass screen goes far beyond aesthetics; it’s a critical decision that impacts a small bathroom’s hygiene, light, and perception of space. A fabric shower curtain, while inexpensive and easy to install, is a classic hygiene hotspot. Its porous surface and billowing folds create an ideal environment for mould and mildew, especially at the bottom hem where water collects. Frequent washing is required to keep it sanitary, adding to the household chores.
A glass screen, on the other hand, offers a non-porous, smooth surface that is inherently more hygienic. It doesn’t harbour moisture in the same way and can be quickly cleaned with a squeegee after each use, preventing the buildup of soap scum and water spots. From a spatial intelligence perspective, a clear glass panel is a powerful tool in a small bathroom. It allows light to flow freely and creates an uninterrupted sightline, making the entire room feel larger and more open. This is a significant advantage over an opaque curtain, which visually bisects the space and can make it feel more cramped.
While the initial cost is higher, the long-term benefits in hygiene and maintenance often justify the investment, particularly for busy families. The following table breaks down the key differences to help you make an informed decision based on your priorities.
| Factor | Shower Curtain | Glass Screen |
|---|---|---|
| Microbe Surface Area | Large porous fabric surface | Non-porous smooth surface |
| Maintenance Frequency | Weekly/bi-weekly machine wash | Daily 30-second squeegee |
| Mold Resistance | Prone to mildew at bottom hem | Resistant with proper ventilation |
| Installation Cost | $20-$50 DIY installation | $300-$800 including installation |
| Humidity Control | Limited barrier to steam | Superior containment of moisture |
Ultimately, upgrading from a curtain to a glass screen is a strategic move that enhances both the sanitary functionality and the perceived size of your small bathroom.
The Spacing Error That Makes It Hard to Clean Behind the Toilet
The narrow, dusty gap behind the toilet base is one of the most neglected and frustrating areas to clean in any bathroom. This awkward space is a result of a standard toilet’s design, which features a convoluted trapway that collects dust and makes access with a normal brush or cloth nearly impossible. This isn’t just a cleaning annoyance; it’s a significant design flaw that creates a reservoir for dust, hair, and airborne particles, turning it into a persistent hygiene problem.
Without a full remodel, you can’t change the plumbing layout, but you can make targeted interventions to mitigate the issue. The most effective long-term solution that doesn’t involve moving plumbing is to upgrade to a skirted toilet. This modern design features a smooth, concealed trapway that eliminates the curves and crevices at the base. The flat sides go all the way to the wall, making cleaning a simple wipe-down and completely removing the hard-to-reach gap.
If replacing the toilet isn’t an option, there are other strategies. Specialised cleaning tools, such as long-handled, flexible microfiber wands or steam cleaning nozzles, are designed specifically to reach these tight spaces. Another preventative measure is to apply a very thin, clear silicone bead around the base of the toilet where it meets the floor. This prevents dust and stray moisture from getting underneath the fixture, but be sure to leave a small, unsealed gap at the very back to allow any water from a potential leak to escape and become visible.
- Install a skirted toilet with a concealed trapway to eliminate dust-collecting curves.
- Use long-handled, flexible microfiber tools designed specifically for tight spaces.
- Consider using steam cleaning wands that can effectively sanitize the area without physical contact.
- For a permanent solution during a future upgrade, a wall-hung toilet provides complete floor access for the easiest cleaning possible.
Addressing this seemingly small detail can make a huge difference in the overall cleanliness and maintenance of your small bathroom.
In Which Order Should You Replace Fixtures to Minimize Downtime?
When you’re upgrading a bathroom without a full remodel, the sequence of events is just as important as the fixtures you choose. A well-planned workflow minimizes the time your bathroom is out of commission—a critical factor in a one-bathroom flat. The key principle is to group tasks by type: dry work first, then wet work, and shut off the water only once if possible. A smart sequence prevents you from damaging new installations or having to undo your own work.
Start with all the “dry” tasks. This includes any painting, installing new shelving, or upgrading light fixtures. Completing these first means you won’t risk splashing paint on a brand-new vanity or dropping a tool on a new toilet. The next step is to install the largest items that don’t require an immediate water shut-off, such as the vanity cabinet. You can install the new faucet onto the vanity before the main water supply is even turned off.
The most crucial step is to coordinate the “wet” work. Plan a single block of time to shut off the main water supply to the bathroom. During this window, you can remove the old toilet and tap, install the new toilet, and connect the new faucet to the water lines. This consolidation of plumbing tasks is the secret to minimizing downtime. Some focused makeovers show that a full bathroom transformation focusing on fixtures and paint can be completed for as little as $250 with careful planning.
- Day 1 Morning: Unbox and inspect all new fixtures for damage before you remove anything old.
- Day 1 Afternoon: Complete all dry work—painting, shelving, and installing new light fixtures.
- Day 2 Morning: Install the new vanity and mount the faucet to it while the water is still on.
- Day 2 Afternoon: Shut off the water supply once to replace the toilet and connect the new faucet lines simultaneously.
- Day 2 Evening: Restore the water service and thoroughly test all new connections for leaks.
This methodical approach ensures a swift, successful upgrade, returning your essential space to service in the shortest time possible.
Why the Space Above Your Door Is the Best Storage You Are Not Using?
In the quest for storage in a small bathroom, we tend to look down—at floor cabinets, under-sink vanities, and wheeled carts. However, the most valuable and underutilized real estate is often right above your head. The vertical space above the door frame is typically empty, yet it offers a perfect spot for storage that is both out of the way and surprisingly practical. This is a prime example of applying spatial intelligence to maximize a room’s volume.
Installing a simple, sturdy shelf in this location serves two key functions. First, it provides an ideal home for items you don’t need daily access to, such as spare towels, extra toilet paper rolls, or bulk toiletries. Storing these items in closed baskets on the shelf keeps them dust-free and out of sight, decluttering the more visible areas of the bathroom. This frees up precious cabinet and counter space for your everyday essentials.
Second, and perhaps more importantly from a sanitary perspective, this elevated storage protects clean items like towels and robes from the “toilet plume.” When a toilet is flushed, it releases a fine aerosol of microscopic particles into the air. Storing textiles high and away from the toilet is a simple yet effective hygienic strategy. As one homeowner noted in a townhouse guest bath, adding a simple ledge with hooks “went a long way in improving the look and feel of the space,” while also keeping towels cleaner and more accessible.
- Measure the width of your door frame and select a shelf that is slightly shorter for better visual balance.
- Install sturdy shelf brackets at least 8 inches above the door frame to ensure clearance.
- For a seamless, built-in look, paint the shelf and brackets the same colour as your walls.
- Use closed baskets for storing items you want to protect from dust, or use open shelving for displaying decorative items.
This simple shelf is a powerful, low-cost intervention that adds significant functionality without taking up any floor space.
The Patch Test Step That 90% of People Skip at Their Peril
In the enthusiasm to clean, descale, or seal a bathroom, it’s tempting to apply a new product everywhere at once. However, this is a risky gamble that a vast majority of people lose. Bathroom surfaces—acrylic tubs, porcelain sinks, chrome taps, natural stone tiles—all react differently to chemicals. Skipping a patch test is not a shortcut; it’s an invitation for irreversible damage like chemical burns, discoloration, or etching. As experts warn, this step is absolutely essential.
A patch test is critical for harsh mold removers on grout, descalers on chrome/brass finishes, and sealants on acrylic vs. enamel tubs to prevent irreversible chemical burns, discoloration, or etching.
– Home Improvement Experts, DIY Bathroom Safety Guidelines
The principle is simple: test every new product on every different type of surface before you commit to a full application. This applies to cleaning agents, paints, sealants, and grout colorants. The process, known as the “Conceal and Wait” method, is straightforward and requires only patience. It’s the ultimate form of targeted risk management in any DIY bathroom project.
By taking 24 hours to perform this simple check, you safeguard your fixtures and surfaces from costly damage. It’s a small investment of time that provides complete peace of mind and ensures your bathroom improvements enhance the space rather than ruin it. This single habit is one of the most important differentiators between an amateur DIY job and a professional-quality result.
Your Essential Patch Test Checklist: The Conceal and Wait Method
- Choose a Hidden Spot: Select an inconspicuous test area for each surface, such as behind the toilet, the underside of the sink, or a tile in a corner hidden by a mat.
- Apply as Directed: Use the cleaning product, paint, or sealant exactly as you would on the main, visible surface, following the manufacturer’s instructions precisely.
- Mark and Date: Place a piece of removable tape (like painter’s tape) next to the test spot and write the date and product name for easy reference.
- Wait 24 Hours: Allow the product to sit for a full 24 hours. This gives time for any slow chemical reactions, colour changes, etching, or other forms of damage to become visible.
- Inspect and Verify: After the waiting period, carefully inspect the test spot under good light. If there is no adverse reaction, you can proceed with confidence. If there is any damage, you’ve just saved yourself from a disaster.
This non-negotiable step protects your investment and ensures your efforts result in improvement, not regret.
Key Takeaways
- True bathroom hygiene comes from actively controlling moisture and airflow, not just from surface cleaning.
- The sequence of your upgrades is as crucial as the upgrades themselves for minimizing disruption and protecting new fixtures.
- Small, preventative actions like performing a patch test and choosing the right sealant have an outsized impact on the long-term success of your project.
How Energy-Efficient Plumbing Upgrades Cut Your Water Bill by £200/Year?
Improving the sanitary functionality of your bathroom is not just about cleanliness; it’s also about efficiency. The invisible flows of water and energy through your bathroom have a direct impact on your monthly utility bills. Strategic, energy-efficient upgrades can lead to significant savings over time, often paying for themselves while contributing to a more sustainable home. These changes are among the smartest financial interventions you can make.
The most impactful upgrades target water consumption. Modern low-flow fixtures, including toilets, showerheads, and tap aerators, are engineered to use significantly less water without compromising performance. For instance, a WaterSense-certified showerhead can reduce water use by 20% or more, while a low-flow toilet can save thousands of gallons per year. These are simple, direct replacements that require no changes to your existing plumbing.
Energy consumption is the other half of the equation. A significant portion of your energy bill comes from heating water. By using less hot water via low-flow fixtures, you automatically reduce your energy usage. A case study on budget-friendly upgrades highlighted that combining these fixtures with smart lighting choices, such as switching to lower-wattage LED bulbs, can have a great impact. As noted in a report on simple bathroom improvements, these combined changes significantly reduce both water and energy consumption, leading to annual savings that can easily reach or exceed £200 for an average family.
By focusing on these smart, efficient plumbing and lighting choices, you complete the transformation of your bathroom, making it not only more hygienic and functional but also more economical and environmentally friendly.